|
ANIMATION |
|
|
ANIMATION |
TAKE THE CAMP MULTIMEDIA SURVEY!!!!!!!!
HERE IS WHAT WE WILL BE LEARNING THIS WEEK:
Flash is Macromedia's powerful vector-based animation tool. Flash is the defacto standard for Internet multimedia because it allows authors to create online multimedia presentations with minimum file sizes. With Flash, Web presentations can blend text and pictures with video and audio, interactive buttons, and animated charts and graphs.
LOOK AT THESE FLASH EXAMPLES!!
Example 3 (Mat made this!)
Example 9 (Ian made this!)
Flash is also becoming a rich ground for multimedia because its interactivity lends itself as a medium to non-linear, reader-directed storytelling.
While Flash is used on the most advanced Internet media sites, basic uses, like generating animated slideshows and animating objects, are fairly easy to learn.
First we are going to look at basic shape drawing and animation tools and the workspace.
This tutorial was written for Flash CS5, so some of the procedures we describe may be slightly different if you have a newer version of Flash.
Getting Started: The Work Area
Launching Flash will load the work area page. The work area has the follow ing main sections: the stage, the timeline, the properties, the tools, and the library.
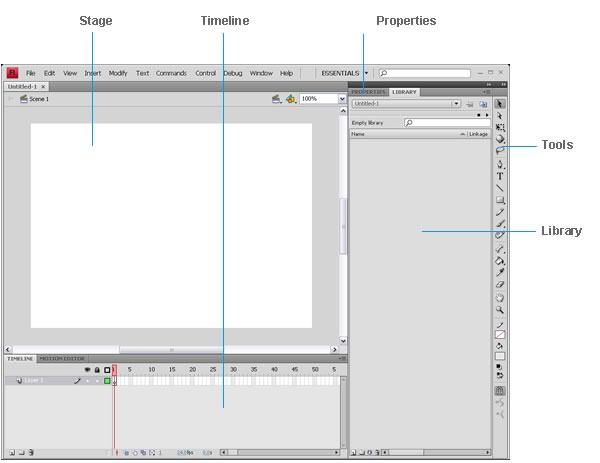
Tools
Selection tools Arrow
· Subselection
· Lasso
Drawing tools
· Pen
· Line
· Oval
· Text
· Rectangle
· Brush
Transforming tools
· Transform
· Fill
· Inkbottle
· Paintbucket
YOUR BEST FRIEND = Command Z (this erases your previous move)
CLARIFICATION:
A movie is your Flash project, whether a slide show of still photos or bouncing balls, as opposed to a video clip that you might edit in Adobe Premiere and embed in a Flash movie.
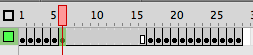
Timeline
It’s divided into frames, like a video or animation, with 12 frames per second being the default [but change it to at least 15].
The rectangular red box is the playhead that you move to see changes on the Stage. Play your movie by hitting "Return"
When the Timeline opens:
· It displays one layer with hundreds of little boxes.
· Each box corresponds to a single frame.
· You can make those frames bigger or smaller by clicking the pop-up box at the end of the line of frame numbers (it has what looks like a little Frankenstein scar).
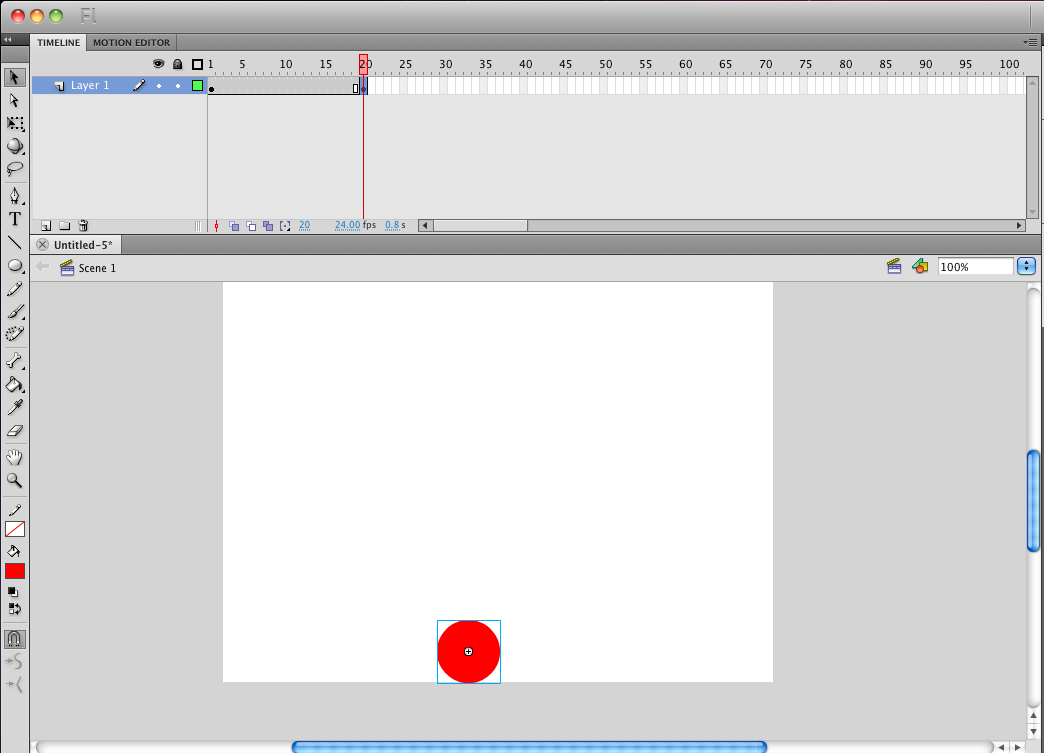
· In the single layer, the first box is outlined in black and contains an empty circle. That first box is a blank keyframe.
· The rest of the boxes are outlined in gray. Boxes with gray outlines are called “protoframes” – they’re placeholders. Every fifth protoframe is tinted gray; the rest are white.
· A frame with an empty circle means it is a blank keyframe with nothing in it. Put something in it, and the empty circle changes to a black circle, which indicates a keyframe.
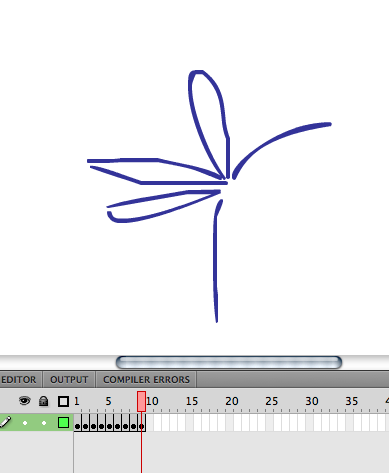
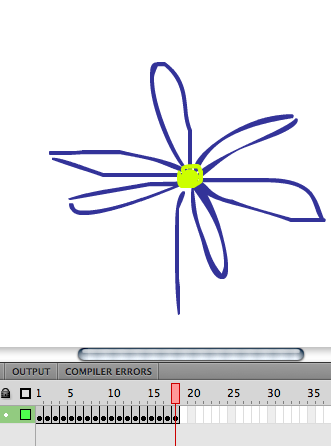
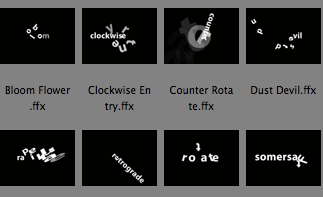
2. ANIMATING WITH F6, F5, AND F7
F6: Then press "F6" and keep on drawing petals, entering "F6" before every stroke.
F6 copies whatever information you have on the previous key.
|
|

F7 creates a "blank keyframe". Now start building a completely different animation (continuing to use F6, F5, and F7), perhaps with different colors. In the "Properties" box, experiment with the size of your brush and with the level of "smoothing." Also experiment with frame rate.
Here is some INSPIRATION and some MORE INSPIRATION
Find PD images from use Flickr’sCreativeCommons, theNewYorkDigitalPublicLibrary'sFlickrPhotostream, orWikimediaCommons (all images need to be selected from the Public Domain or Creative Commons). Students will pick a theme for their collage and go for it (e.g., flowers, geese, shoes, etc). Students might want to take a photo of themselves and include themselves in the Collage (using PhotoBooth). Students will then review each other’s work before the end of the day. (Peer Review)
Add music to the animation
USE FREEPLAYMUSIC.COM or ROYALTY FREE MUSIC to pick a piece of music. These are public domain/copyright free music sites.
Never use copyrighted music for any creative work.
Open your animation file. To import any file into Flash: go to File -> Import to Library, then select the appropriate file
(in this case your looping audio clip) and import it.
If you look in your library, you'll see the name of your audio file with a little speaker icon next to it, indicating that it's an audio file.
You can even play the file in the preview window, by clicking the little "play" arrow in the area above the library list.
To place the audio in your scene, you're going to create a new layer. Rather than drag and drop the audio file onto a keyframe
as we normally would, however, instead you're going to click on the first frame in the layer, then go to the Properties taskbar.
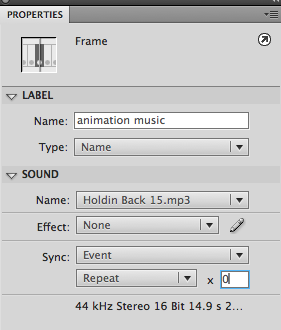
To the top right you'll see a dropdown that says "Sound" and, in the options, "none".
If you click on that, now, it should expand to show a list of all audio files in your library (it might only show one--the mp3 you just downloaded)Select that file.
For "Repeat," select 0.
There are frames and then there are keyframes. A keyframe signifies the beginnings of changes in an image.
Flash does its magic and figures out the middle, the inbetween part and the end of a motion. This is called TWEENING.
To create a motion tween:
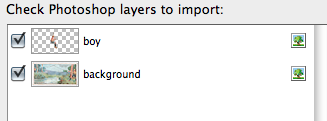
First, IMPORT the Photoshop fIle" ziplineboy.psd" (your counselor will give you this file)
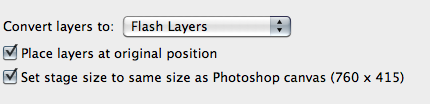
Make sure you Check the following, then click "OK":
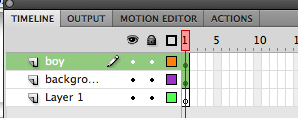
The timeline will look like this (it's a good idea to name your layers):
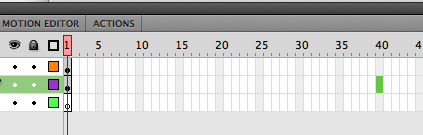
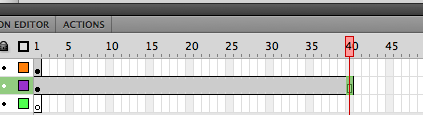
Second, put your curser on frame 40 of the BACKGROUND layer and hit Function/F5 (it's just F5 if you're not using this small funky keyboard).
This will elongate your layer. (See below)
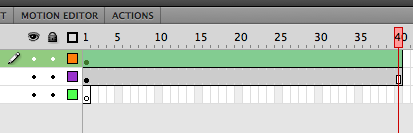
Third, make a MOTION TWEEN for the top layer (boy).
Hold down the Command key; Click on the keyframe for that layer, and then Right click: you'll find the option to "Create a Motion Tween." Flash will prompt you to "create a symbol." Do it! (Good practice: go to the library and name the symbol).
Fourth, drag the motion tween (the layer will be green as it's selected) to meet the background layer.
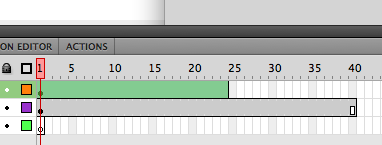
PULL TWEEN SO IT MEETS THE OTHER LAYER
Fifth, put the boy to the far left of the stage on frame one. Move the cursor to Frame 20, and THEN move the boy to the middle of the rope swing (so he logically appears hooked to the middle of the rope). Finally, move the cursor to the last frame, and then move the boy to the far right of the stage.
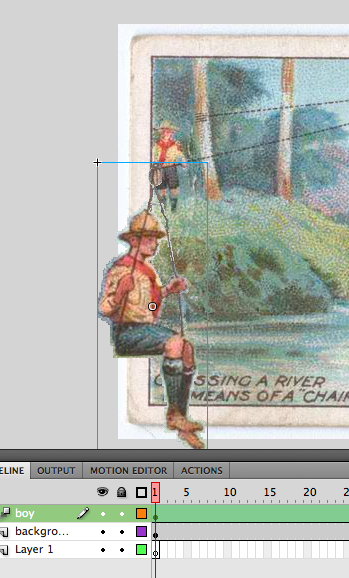
Sixth, See if you can put a bend in the tween by selecting the orange dotted tween line and bending it, to make the swing up and down more realistic.
THE BOUNCING BALL ANIMATION… in FLASH!!
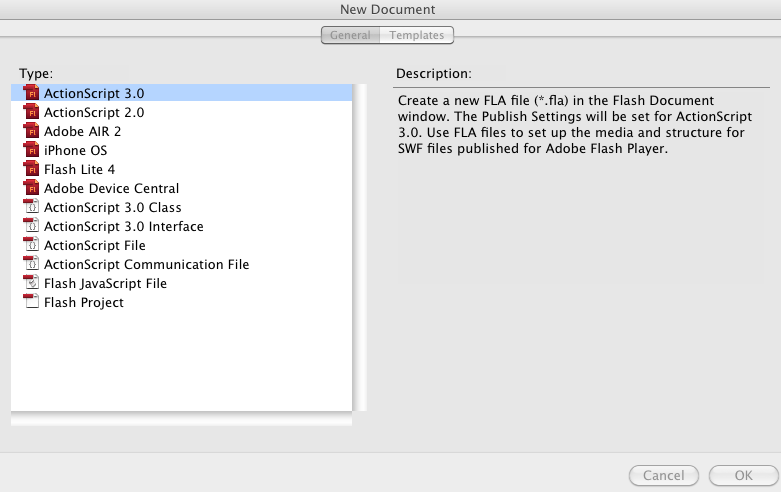
1. Create a new Flash document (Command + N) for your sweet animation you're gonna cook up. Make sure you pick Actionscript 3.0!
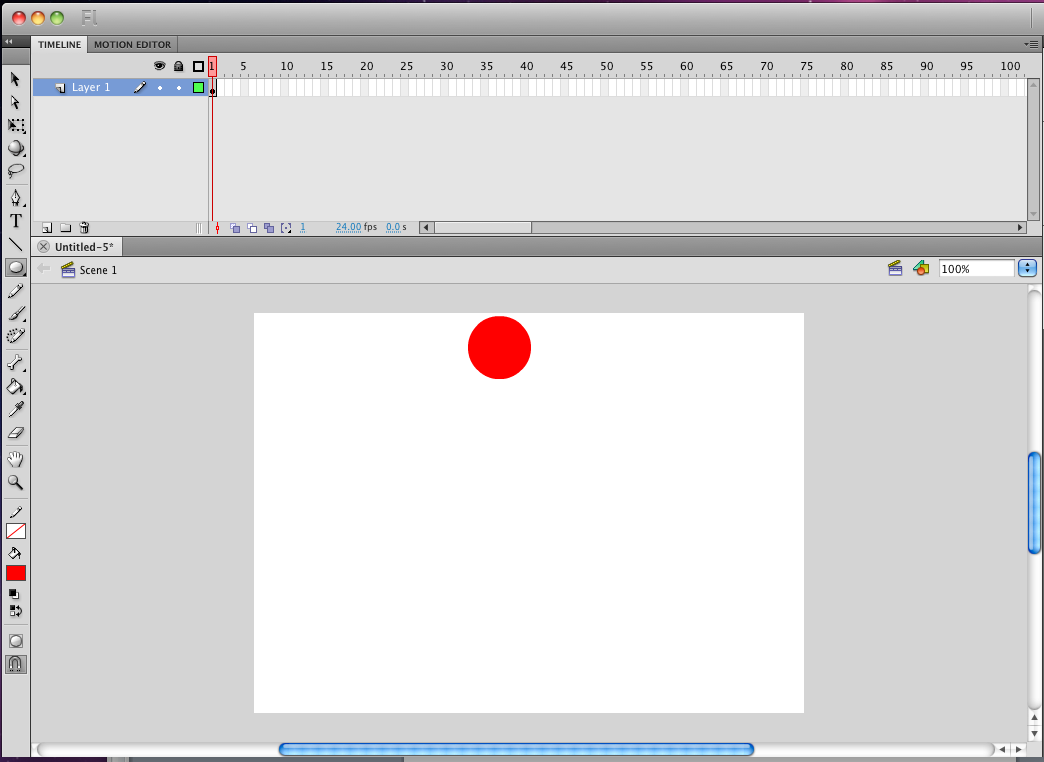
2. Choose a color you want your ball to be. Red, orange, blue, it doesn't matter. Pick your favorite color.
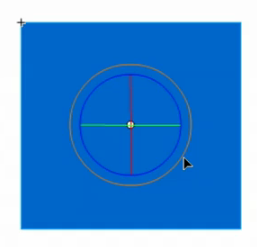
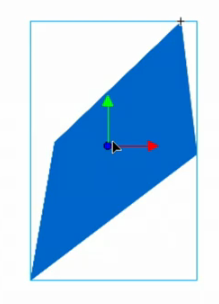
3. Select the oval tool ![]() to begin to create your ball. Draw your ball and don't forget to hold shift to create that perfect circle.
to begin to create your ball. Draw your ball and don't forget to hold shift to create that perfect circle.
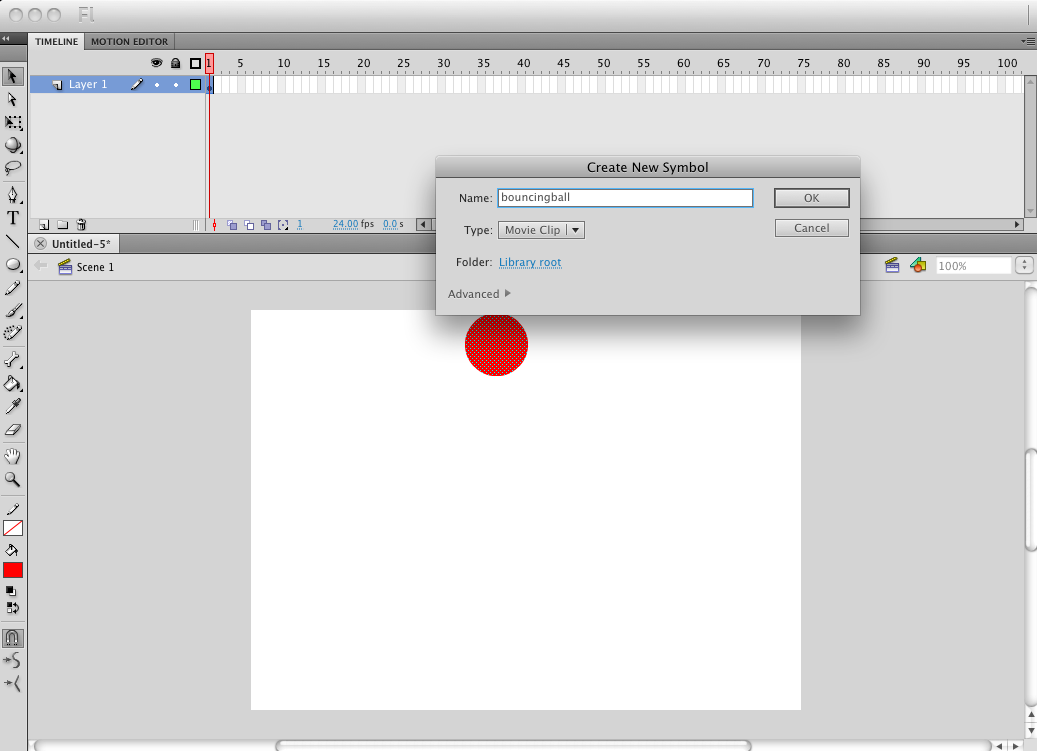
4. Select your ball with the selection tool to turn it into a SYMBOL.
5. Click F8 after selecting your ball. Turn it into a Movie Clip.
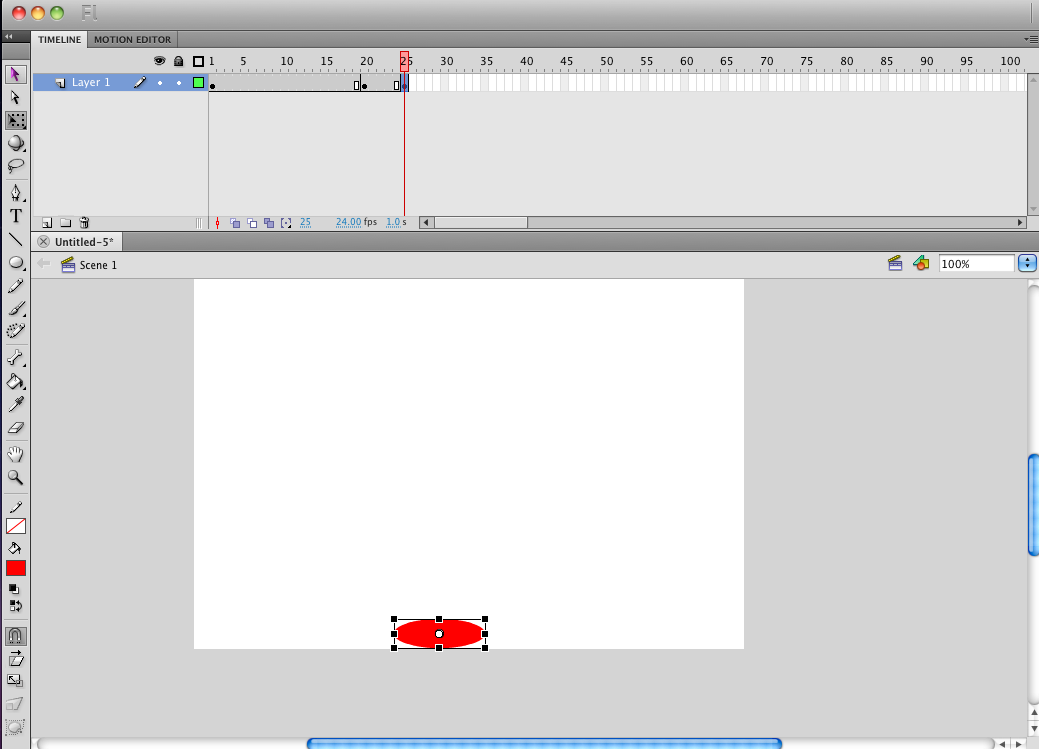
6. Select FRAME 20 and click F6. Then move your ball to the bottom of your stage.
7. Select FRAME 25 and click F6. Use the free transform tool to make the ball short and fat. Move the ball to the bottom of the stage.
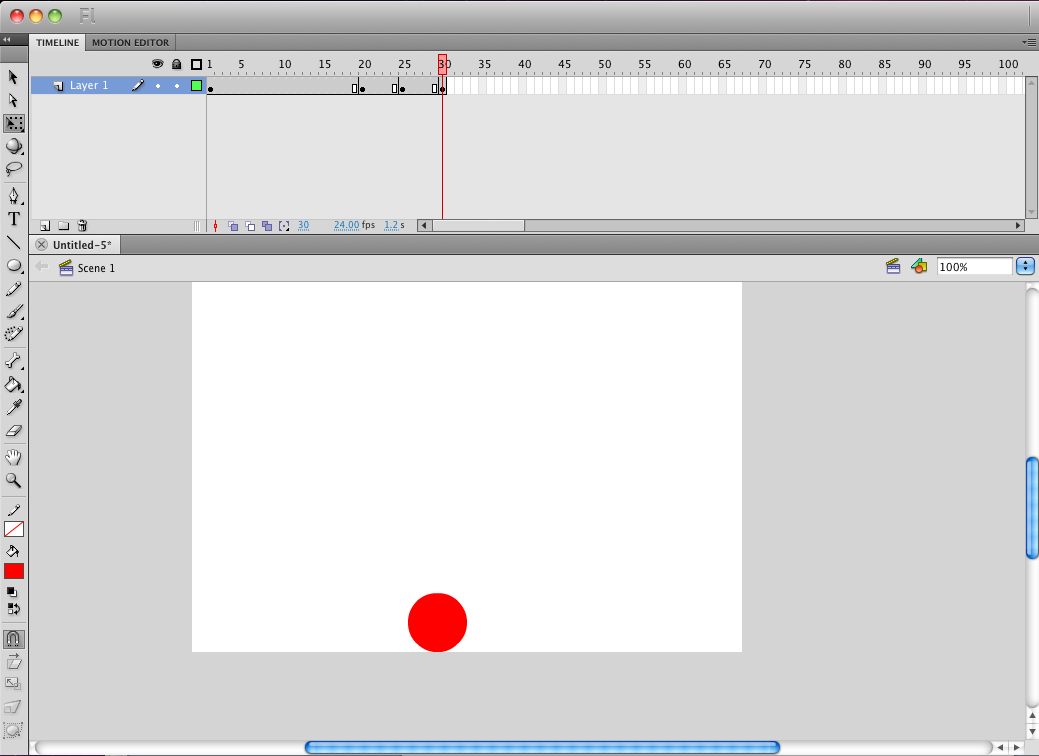
8. Select FRAME 30 and click F6. Use the free transform tool to make the ball in the shape of a perfect circle. Move the ball to the bottom of the stage.
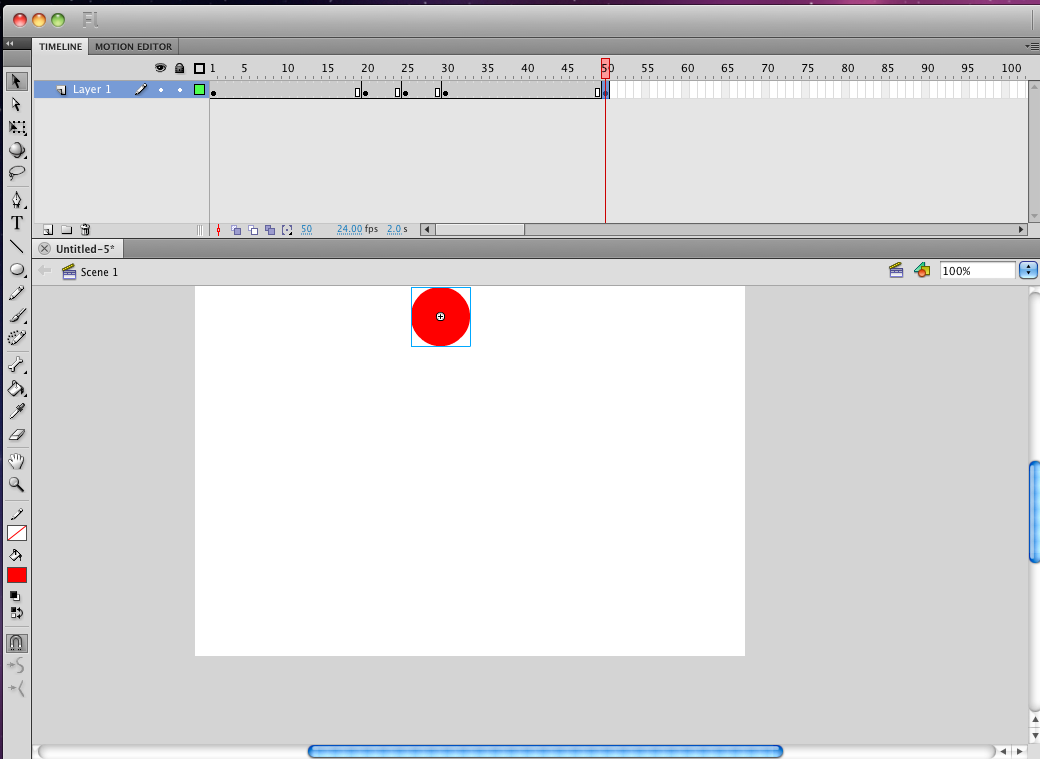
9. Select FRAME 50 and click F6.
10. Move your ball from the bottom of the stage back up to the top.
11. Now it's time to create some CLASSIC TWEENS! Click in a frame between 1 and 20. Right click and select Create Classic Tween. Do the same thing for a frame between 20 and 25. You're not done yet, you gotta do the same thing for a frame between 25 and 30. Now the last step.. do the exact same thing for a frame between 30 and 50.
12. Click Command + Enter to see your work!
Turn a circle into a star.
Shape tweens are fun because they look really cool and they’re easy to create. Compared to motion tweens, they look more dynamic because every attribute – including the shape – animates.
In shape tweening, you draw a vector shape at one specific frame in the Timeline, and change that shape or draw another shape at another specific frame. Flash then interpolates the intermediate shapes for the frames in between, creating the animation of one shape morphing into another.
Shape tweens work best with simple shapes. Avoid shapes with cutouts or negative spaces in them. Experiment with the shapes you want to use to determine the results. You can use shape hints to tell Flash which points on the beginning shape should correspond to specific points on the end shape.

You should now have a keyframe in frame 1 with a square and a keyframe in frame 30 with a circle.

Flash interpolates the shapes in all the frames between the two keyframes.
Preview the animation by pressing the Enter key.

Tip: Flash is really unforgiving when you don’t follow its rules. Luckily, the rules for a shape tween are very simple: no groups and no symbols. That’s it. Remember these two things, and shape tweens will be easy. Also, Text acts as if it is a grouped or a Drawing Object from the beginning. This means that you can’t use text in a shape tween unless you first break it apart (by selecting Modify, Break Apart). If text contains more than one character, you have to break apart twice – once to break the text into individual characters and another to turn it into individual shapes. Remember, too, that after text becomes a shape it is no longer editable!
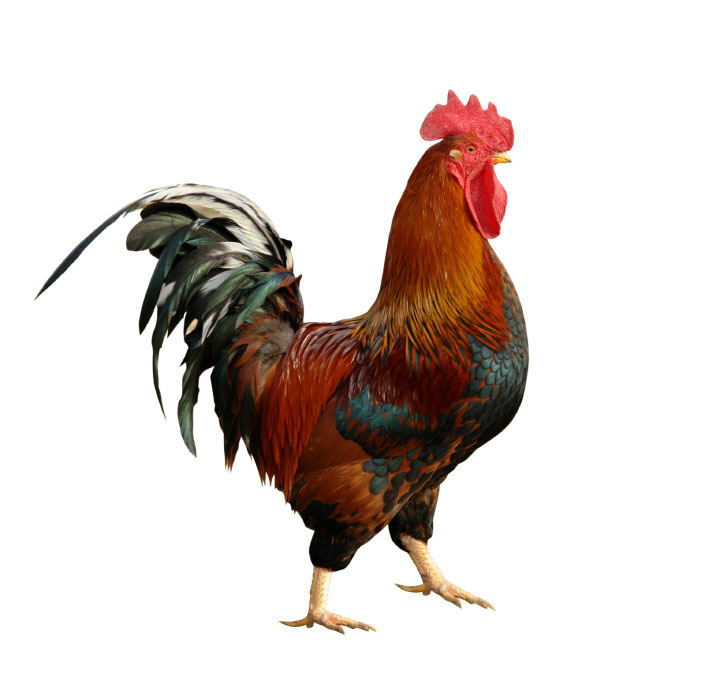
How to use Photoshop to isolate an image from its background and and save them as PNG files
Download these 3 images.
 |
 |
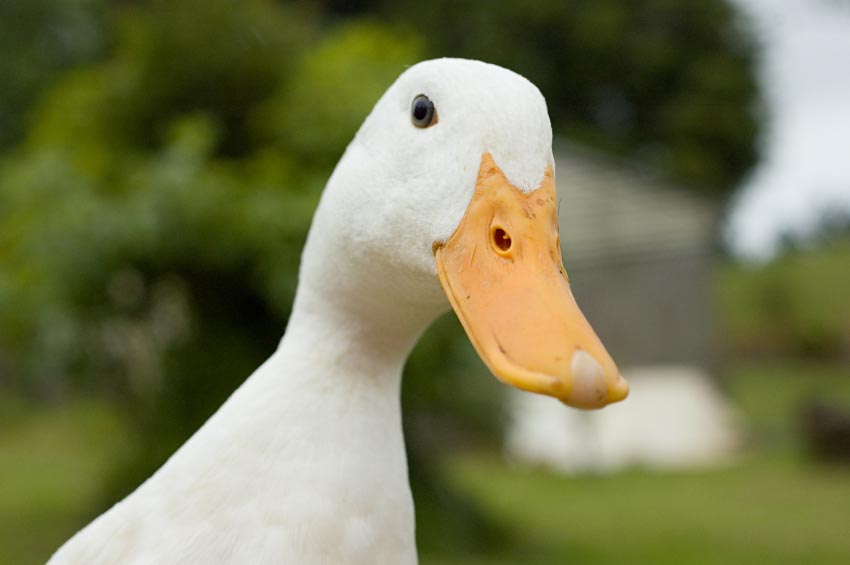 |
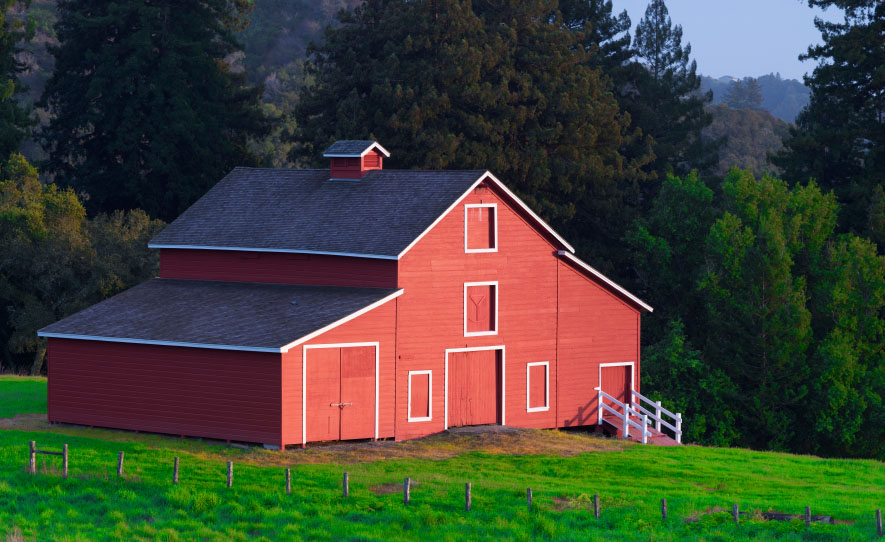
| Use the magic eraser for the chicken | Use the Magnetic Lasso for the Barn |
Use the Quick Selection tool for the duck |
Put all the farm animals in a layered PSD file (to animate later in FLASH)
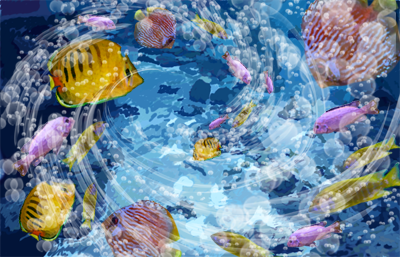
OR import this PSD "Fish" file from your counselor.
File/Import/Import to Stage: (SELECT PSD FILE)
The layers will be automatically imported.
Animate the specific photographic components using Motion Tweens!
8. MOVIE CLIPS
Movie clips are a type of symbol in Flash (the three types are graphic, button, and movie clip). They act like mini-movies inside the main movie, so they can play parallel to (or simultaneously with) other parts of the movie. With movie clips, a Flash movie that had 100 or more frames could be pared down to as little as one frame!
Some people wrongly think that Graphic symbols are only for when the symbol contains a single frame and Movie Clip symbols are only for when you have multiple frames. The differences go much deeper than that. The best approach is to always use Movie Clips unless you have a reason to use Graphic symbols. The first thing to learn is that both Movie Clips and Graphic symbols can contain one or more frames. However, only Movie Clips will automatically loop regardless of where you place instances of that clip.
Movie clips offer incredible versatility to a Flash designer, and yet it takes some practice before working with them begins to feel comfortable. After you figure out how useful they are, you will begin to realize that almost every cool thing you’ve ever seen in a Flash movie was done with movie clips. They really are worth the effort.
Start with a new Flash document and change your frame rate to 24 fps.
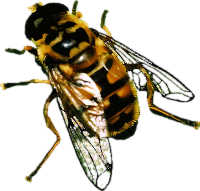
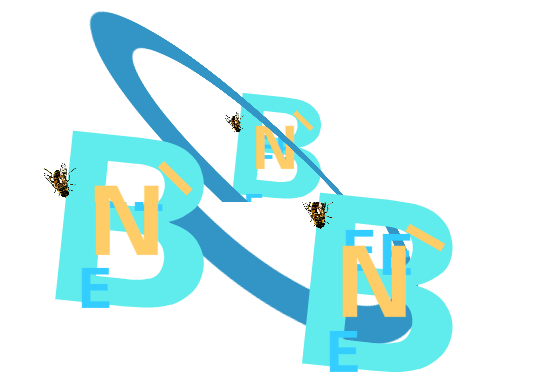
Create a shape, or import a graphic (the bee.png for example!) and convert to symbol (F8).

Double click on the bee symbol on the stage. You'll know it's a symbol by its blue outline.
You're now in Movie Clip Editing Mode--you'll know by the blue arrow in the upper left hand corner of the screen:


On the stage, make the graphic symbol bee move along a motion tween.
(Use Bezier curves to make the bee's path more interesting.)
Now you're ready to get back to the first "Movie Clip" layer....
Click the blue arrow to get out of "Movie Clip Editing Mode."
You'll see that you have a single bee moving.
Finally, go to the LIBRARY and select the "bee" movie clip and drag it to the stage.
Do it again.
(Now have fun resizing the bees, or flipping them so they go in opposite directions).
You have 3 instances of the bee movie clip on the stage.
You can apply movie clips to any flash movie.

- Anchor Point
- Position
- Scale
- Rotation
- Opacity


Create a New Composition.
Start with a solid background.
Find the TEXT tool, type some text into the composition window (your name is a good choice) and a new layer will automatically appear.
Select Text layer in the timeline, and open up the layer.
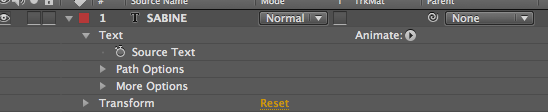
Over to the right there is a separate button called “Animate”…If you don’t see the “Animate” button, click on the first or second icon at the bottom left of the screen and expand the layer switches panel.
Twirl the “Animate” button down and you’ll be able to choose various properties to animate.
Range selector determines which characters are selected by the particular adjustment.
Offset value: takes the value of the range and shifts it around.
Go to the “Add” menu and you can add additional properties to the original animation.
13. ANIMATING TEXT WITH PRESETS
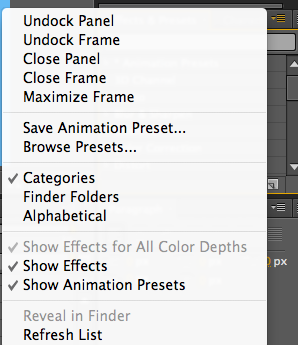
There's a quicker way to animate text though! Go to the Effects and Presets Panel:
Go to Click on flyout menu (little icon that looks like a bunch of lines) on the right hand side of the Effects and Presets panel:

From that flydown menu,
choose “Browse Presets”
It opens up Adobe Bridge. You can select from a variety of text animations.
Click to Preview; Double click to apply the effect.
14. USING THE PUPPET TOOL
Import the HUNGARIAN boy PHOTOSHOP FILE (a layered photo in photoshop with separated "arm" and "body" layers). Import as a "Editable Layer Styles" . VIEW THIS HELPFUL TUTORIAL.
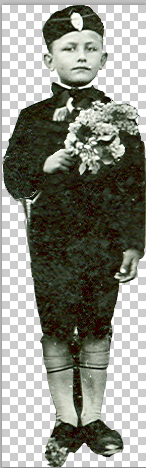
ADD Puppet pin tools (thumbtack icon on top tool bar).
Attach pins to the boy's arm (elbow, wrist, top of flower).
Also attach pins to the boy's body (forehead, chest, waist, legs)
Put cursor over the pins, and you get a move icon, and you can move portions of your object around.
For precise movements recorded in the timeline, twirl down Puppet/Mesh/Deform, and each individual pin, which you can animate.
For speedy animation, hold down Control/Command key and you get a little stop watch.
Keeping it hold down and moving mouse back and forth, AE remembers that motion.
Puppet Starch tool: if things are moving that shouldn’t be, you can go anchor them down using the Starch tool.
FFINAL PROJECT REQUIREMENTS: ANIMATION