This Page
will help you with the following actions:
Adding
transitions, Working with Images and Animations
Adding
Transitions
A transition is the
action which will happen as you leave one slide to go to another. Transitions
are an optional addition to a PowerPoint Presentation and simply serve to
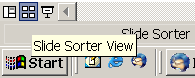
make the presentation more visually appealing. On the bottom left-hand side
of the screen, above the start menu, there are three icons. Choose the middle
icon which is called slide sorter (shown below). The screen will be covered
with miniatures of each slide.
From the "Slide
Show" menu, select "Slide Transition"
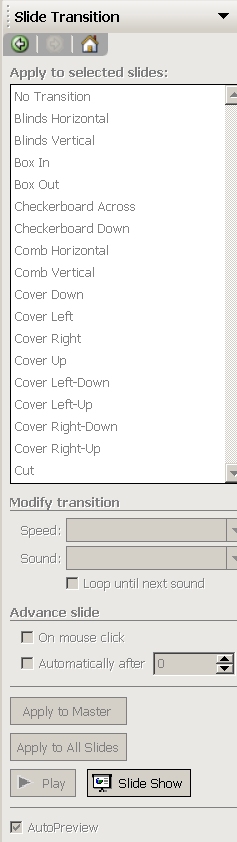
When you select the "Slide
Transition" option, a menu of transitions will appear on the right side
of your screen.
Select a slide from your
presentation, and you can apply a transition to one, some, or all of your
slides using this menu. You can even modify the speed or add sounds. There
is even an option to apply your transitions too all the slides, or to use
random transitions.
After selecting your
transition preferences, select "Play" to see the transitions play
out on your screen, or select "slide show" to preview the entire
show with transitions.
Working with Images:
Images can be imported
from clipart, online sources, from a scan or camera, or pictures that you
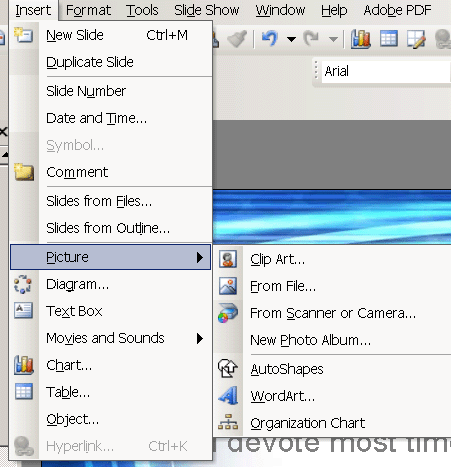
may have on file. To insert an image, click the "Insert" tab and
hold your cursor over "Picture"
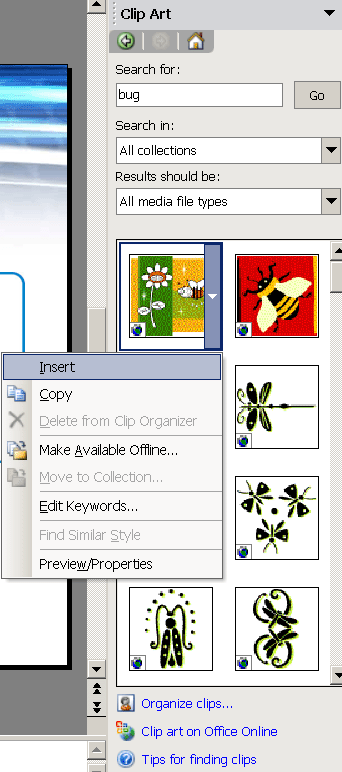
To use clipart, select
clipart and a clipart menu will appear on the right side of your screen. You
can search for appropriate clipart pictures and insert them in your presentation
by putting your cursor over the picture until the arrow shows up, click on
the arrow and select "Insert."
For pictures, simply
use the menu that comes up when you select "Picture"
from the "Insert" menu to browse for your file where the picture
is saved.